Balloon-Powered Car Project
By the School Project Lab Team · Updated · 6 min read · Elementary (K–5)
In this guide
A balloon-powered car is a fun, fast elementary STEM project that turns a balloon, a bottle and a few straws into a car that zooms across the floor. It teaches a big science idea in a way kids can see and feel: air pushing backward makes the car move forward. This guide shows your family how to build one, test it fairly and fix the common problems that keep a balloon car from rolling.
The Science in Kid-Friendly Words
When you blow up a balloon and let it go, it flies around the room. That is because the air shoots out one way and the balloon moves the opposite way. Scientists call this Newton's third law of motion: for every action, there is an equal and opposite reaction.
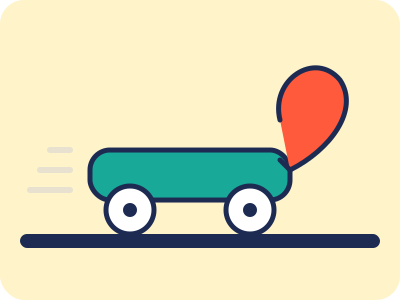
A balloon car uses the same idea, but the wheels keep it going in a straight line on the ground. The air rushes out the back through a straw, and the car moves forward.
Two other ideas matter too:
- Friction slows the car down. Wheels that rub or axles that stick waste energy.
- Weight matters. A heavier car needs more push to get moving.
Your child can explain these three ideas in the presentation: thrust from the balloon, friction from the wheels, and the car's weight.
Supplies and Safety
You need a small plastic water bottle or a juice box (the car body), two drinking straws for axle holders, one bendy or regular straw for the balloon nozzle, two wooden skewers for axles, four plastic bottle caps for wheels, a balloon, masking tape, a rubber band, and a tape measure.
Safety notes for parents:
- An adult should make holes in the bottle caps. Use a pushpin to start the hole and then widen it with the skewer, or use a small hand drill. Do not let young children push sharp points by themselves.
- Wooden skewers have sharp tips. An adult can snip the points off with strong scissors after the wheels are on.
- Balloons can be a choking hazard for young children. Keep balloons and broken balloon pieces away from toddlers and little siblings, and throw away popped balloons right away.
- If anyone in the house has a latex allergy, look for latex-free balloons.
- Do not inflate balloons to the point of popping near faces. Wear safety glasses if testing a lot.
Build the Car Step by Step
- Make the axle holders. Cut two straws a little wider than the bottle. Tape them across the bottom of the bottle, one near the front and one near the back. Make sure they are straight and parallel to each other.
- Prepare the wheels. An adult pokes a hole in the exact center of each bottle cap. An off-center hole makes the car wobble.
- Make the axles. Slide a wooden skewer through one straw. Push a bottle cap onto each end of the skewer. Repeat for the other straw.
- Check the wheels. Spin each wheel. It should turn freely without rubbing the bottle. If it rubs, slide the caps out a little or move the straw lower.
- Trim the skewer tips. An adult snips off any extra skewer sticking out past the wheels, leaving a little so caps do not fall off. A small piece of tape or a dab of clay on the ends keeps the caps on.
- Attach the balloon. Slide the balloon's opening over one end of a straw. Wrap a rubber band or tape tightly around it so no air leaks out.
- Mount the balloon. Tape the straw to the top of the bottle so the free end of the straw sticks out the back of the car.
- Blow up the balloon through the straw, pinch the straw closed, set the car on the floor, and let go.
Your child should do the taping, assembling, and testing. Parents handle the sharp parts.
Make It a Real Experiment
A great project asks a question. Choose one:
- Does a bigger balloon breath make the car go farther?
- Do bigger wheels go farther than smaller wheels?
- Does a longer straw nozzle change the distance?
- Does the car go farther on a hard floor or on carpet?
Keep everything else the same and change only one thing.
Fair Test Steps
- Pick a smooth, flat floor with plenty of space, like a hallway or garage.
- Put a strip of tape on the floor as the starting line.
- Blow up the balloon the same amount each time. One trick is to measure around the balloon with a piece of string, or count the same number of breaths.
- Place the car's back wheels on the starting line and release without pushing.
- Measure from the starting line to where the car stops, using a tape measure.
- Do at least three runs for each version.
- Write every result in a table.
Your child can add the three numbers and divide by three to find the average. A simple bar graph comparing the averages makes the results easy to see.
Parent tip: Let your child predict what will happen before each new test and write it down. When the result surprises them, ask "Why do you think that happened?" Those surprises often turn into the best part of the presentation.
Troubleshooting Common Problems
- The car does not move: Wheels are probably rubbing or axles are stuck. Make sure the skewer spins freely inside the straw holder.
- The car spins in circles: Axles are not parallel, or the balloon straw points to one side. Re-tape them straight.
- The car moves slowly: Air may be leaking at the balloon. Retape it tighter. Also try a lighter body, like a smaller bottle or a cardboard rectangle.
- The wheels wobble: Holes may not be centered. Remake those wheels.
- The car lifts or tips: The balloon may be too big for the body. Use a slightly smaller balloon breath or move the straw lower.
Fixing problems is engineering. Have your child keep a short list of what went wrong and what they changed. Teachers love seeing that.
Show Your Work
A balloon car display or report can include:
- The question and prediction
- A labeled drawing of the car
- Supplies list
- Build steps in order
- The data table and bar graph
- An explanation of Newton's third law in your child's own words
- Problems they solved along the way
For size limits, materials allowed or race-day rules, check with the teacher or the official rules sheet.
Quick Checklist
Tap the boxes as you go — progress saves on this device only.
- Read the project rules with a grown-up
- Gather a bottle, straws, skewers and caps
- Have an adult poke holes in the caps
- Tape on the straw holders straight
- Put on the wheels and check they spin
- Tape the balloon to a straw tightly
- Make a starting line with tape
- Blow up the balloon the same way each time
- Measure how far the car goes
- Test three times and write it down
- Throw away popped balloons
Time and Cost Estimate
| Item | Estimate |
|---|---|
| Prep time | 20 to 30 minutes |
| Build time | 1 to 2 hours |
| Testing time | 30 to 60 minutes |
| Typical cost | $5 to $15 |
| Difficulty | Easy |
Most supplies come from the recycling bin and the kitchen drawer, so a balloon car is one of the cheapest STEM projects around. With a fair test and a few smart fixes, your child will have a car that rolls and a clear explanation of why it works.
Frequently asked questions
Why won't my balloon car move?
The most common causes are wheels rubbing on the body, axles that do not spin freely, or air leaking where the balloon meets the straw. Check that each wheel spins easily and tape the balloon tightly to the straw.
How does a balloon car work?
Air rushes out of the balloon backward, and that pushes the car forward. This is an example of Newton's third law: every action has an equal and opposite reaction.
What makes a balloon car go farther?
Light weight, wheels that spin freely and stay straight, and a tight seal at the balloon all help. Testing one change at a time shows which improvement matters most.