Ecosystem Project Ideas: Terrariums, Food Webs and Models
By the School Project Lab Team · Updated · 5 min read · Middle School (6–8)
In this guide
An ecosystem project asks your student to show how living things and nonliving things work together in one place. The three most popular formats are a living terrarium, a food web poster and a biome diorama, and each one can be done at home with simple supplies. Below you'll find how to choose, step-by-step instructions for each format, a time and cost guide and a checklist.
The Key Ideas Every Ecosystem Project Should Show
No matter which format your student picks, teachers usually look for the same core ideas. Make sure the final project clearly shows them.
- Biotic factors: the living parts, such as plants, animals, fungi and bacteria.
- Abiotic factors: the nonliving parts, such as sunlight, water, soil, air and temperature.
- Producers: organisms that make their own food, mostly plants and algae.
- Consumers: animals that eat plants or other animals, including herbivores, carnivores and omnivores.
- Decomposers: fungi, bacteria and worms that break down dead material and return nutrients to the soil.
- Energy flow: energy moves from the sun to producers to consumers, and arrows in a food chain point in the direction energy travels.
That last point trips up a lot of students. An arrow from grass to rabbit means "energy goes from the grass into the rabbit," not "the grass eats the rabbit."
Parent tip: Ask your student to explain the food chain to you out loud using a real example from your backyard or a local park. If they can tell you who eats whom and where the energy started, they're ready to build.
Option 1: Build a Living Terrarium
A closed terrarium is a mini ecosystem in a jar. Water evaporates, condenses on the glass and "rains" back down, which makes it a great way to show the water cycle too.
Materials: a clear jar or plastic container with a lid, small gravel or pebbles, a thin layer of activated charcoal made for plants, potting soil, small plants that like humidity such as moss, small ferns or fittonia, and a spray bottle.
- Clean the container. Wash and dry it well so mold doesn't start early.
- Add a drainage layer. Pour in about one inch of gravel so extra water has somewhere to go.
- Add charcoal. A thin layer helps keep the terrarium fresh. Wash hands after handling it.
- Add soil. Layer two to three inches of potting soil. Gently press it down.
- Plant. Use a spoon or chopstick to dig small holes. Place the plants and press soil around their roots.
- Decorate lightly. Add a few stones or a piece of bark. Leave space so you can see the plants.
- Mist and close. Spray the plants a few times, then close the lid.
- Place it well. Keep it in bright, indirect light. Direct sun can overheat a closed container.
Have your student keep a short observation log for one to two weeks. They can note condensation, plant growth and any problems. If there's heavy fog every day, open the lid for an hour. If the soil looks dry, mist it again.
Keep the terrarium plant-only. Bugs and small animals need special care, and travel to school can stress or harm them.
Option 2: Make a Food Web Poster
A food web shows how many food chains connect in one ecosystem. It's a great choice when there isn't much time or space at home.
- Pick an ecosystem. Choose one, such as a pond, a coral reef, a desert, a rainforest, a grassland or a local wetland.
- Research the organisms. List at least two or three producers, several herbivores, a few carnivores or omnivores and at least one decomposer.
- Sketch the layout. Place producers along the bottom, herbivores above them and predators near the top. Put decomposers along one side.
- Draw or print pictures. Students can draw each organism or cut out pictures. Label each one with its name and its role.
- Connect with arrows. Draw arrows pointing from the food to the eater. Yarn and push pins on a tri-fold board make a great 3D web.
- Add the sun. Put the sun in a corner with an arrow to the producers to show where the energy starts.
- Add a "what if" box. Explain what would happen if one organism disappeared. This shows deeper thinking.
Option 3: Build a Biome Diorama
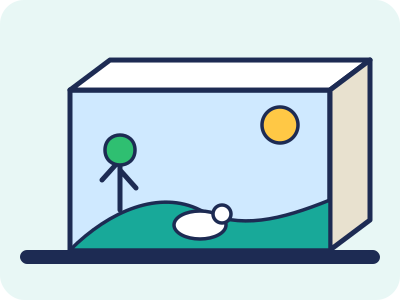
A diorama is a shoebox scene that shows a biome such as a tundra, a desert, a tropical rainforest, a coral reef, or a grassland.
- Choose a biome and research it. Note the climate, common plants, common animals and how they're adapted.
- Paint the background. Turn the shoebox on its side and paint the sky, horizon and landscape.
- Build the ground. Use clay, sand, cotton for snow, shredded paper for grass or blue cellophane for water.
- Add plants and animals. Make them from clay, paper, or small toy figures. Include producers, consumers and decomposers.
- Show abiotic factors. Add a paper sun, a cotton cloud, a river or rocks.
- Label everything. Small flag labels or a key on the side of the box work well.
Hot glue holds parts quickly, but an adult should handle it or supervise closely. Cutting thick cardboard also needs an adult with a craft knife.
Time and Cost Estimate
| Item | Terrarium | Food web poster | Biome diorama |
|---|---|---|---|
| Prep time | 1–2 hours | 1–3 hours research | 1–3 hours research |
| Build time | 1 hour plus 1–2 weeks of observing | 2–4 hours | 3–5 hours |
| Typical cost | $15–$35 | $5–$15 | $5–$20 |
| Difficulty | Moderate | Easy | Moderate |
You can save money by using a recycled jar, plants from your own garden (with permission), or a shoebox from the closet. Small plants for terrariums are often sold inexpensively at garden centers.
Making the Project Stand Out
The projects that impress teachers usually go one step beyond the minimum. Here are simple ideas your student can try.
- Compare two ecosystems. Build two small food webs, such as a desert and a pond, and explain how they differ.
- Show a human impact. Add a section on how pollution, building or invasive species affect the ecosystem, and what people can do to help.
- Use local nature. Study an ecosystem near your home, like a park pond or the backyard, and include photos your student took.
- Include data. For a terrarium, graph how many days had condensation or how tall a plant grew.
Quick Checklist
Tap the boxes as you go — progress saves on this device only.
- Read the assignment and rubric
- Pick a format: terrarium, food web or diorama
- Choose one ecosystem or biome
- List producers, consumers and decomposers
- Draw a quick plan on paper
- Gather supplies
- Ask an adult for help with cutting or hot glue
- Build the project
- Draw arrows the right way, from food to eater
- Label every living and nonliving part
- Practice explaining how energy moves
An ecosystem project is really about connections, and so is helping with one. Let your student lead the research and building, and support them with questions like "What would happen if this animal disappeared?" That's where the real learning happens.
Frequently asked questions
What should an ecosystem project include?
Most ecosystem projects show producers, consumers and decomposers, plus nonliving parts like water, sunlight, soil and temperature. Check the rubric for exactly what your teacher wants labeled.
Can a terrarium survive long enough to bring to school?
Yes, a simple terrarium with hardy plants like moss or small ferns can stay healthy for weeks if it gets indirect light and is not overwatered. Build it at least a week early so you can fix problems before the due date.
Should we put insects or animals in a terrarium?
For a school project, keep it plant-only. Animals need specific care, and moving them back and forth to school can harm them.